Performing authorisations
You can use this page as a virtual terminal to perform authorisations for MOTO (Mail Order/Telephone Order) transactions.
The virtual terminal presents a tabbed interface. You can switch between tabs by clicking the tab name. The principal fields are all grouped on the Standard tab.
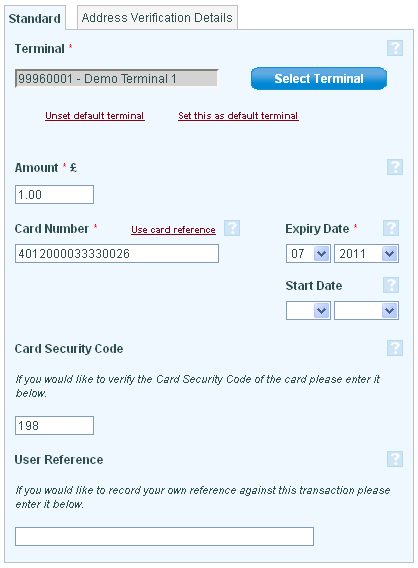
- Terminal
You cannot type directly into this field. To select a terminal, click on the Scope button and follow the instructions for Selecting a terminal using the Scope button. If your account is only configured with a single terminal it should be automatically pre-selected.
- Amount
Enter the transaction amount to be authorised. This should be a decimal money value without a currency symbol (eg, 10, 11.20 etc)
- Card Number
enter the full card number for the transaction without any spaces
- Expiry Date
select the month and year of the card expiry date
- Start date
Where appropriate (eg for SOLO and Swift cards), select the month and year for the card start date
- Issue Number
Where appropriate (eg, SOLO and Swift cards) enter the card issue number
- User Reference
enter an optional ad-hoc descriptive string which will be recorded against the transaction
The Address Verification Details tab contains a series of fields in which you can enter the cardholder address. If any of the values within this tab are supplied Address verification checks will also be applied to the transaction. If you do not want to perform address verification checking you can omit all values on this tab.
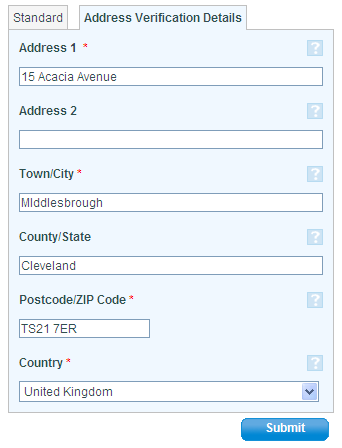
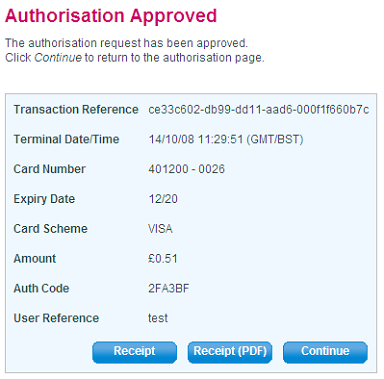
Once you are satisfied that you have entered the transaction values correctly, click on the Submit button to send the authorisation request. You will be asked to provide confirmation that you want to proceed with the authorisation. If you confirm the request it will be submitted for authorisation and - after a few seconds - the response will be displayed.
Specifying the card using the card reference & card hash key.
If you have already authorised a transaction for a card and have stored the unique reference and hash key combination which uniquely identify the card, you may perform a new authorisation without knowing the card number. To select the card using the reference/hash combination click on the use card reference prompt to the right of the Card number field title. The standard card identification fields (card number, expiry date, issue number and start date) will all be hidden and replaced with input fields for the card reference and hash.
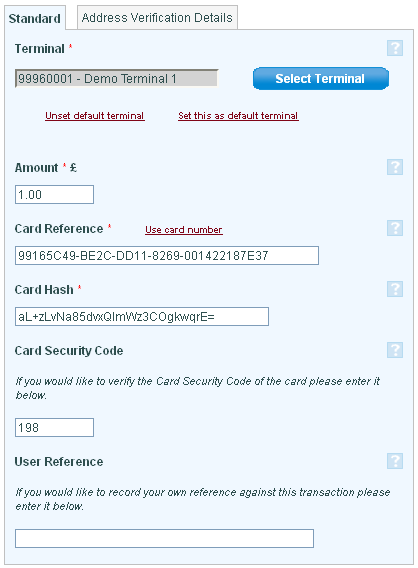
Note that you can return to the standard card details input by clicking on the use card number link. Note also that you will still be required to enter the card security code for an authorisation using the card reference/hash key combination.
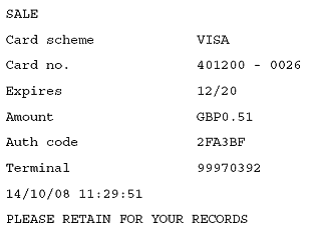
Printing a receiptThe authorisation approved page contains two buttons to print a receipt for the transaction. If you click the Receipt button the standard windows printer selection dialog will be displayed and the receipt will be printed directly to the printer which you have selected. If you click the Receipt(PDF) button the receipt will be generated in PDF format and will be displayed within the browser. You will then be able to print the receipt or save the file for later use or electronic transmission.
Note that the PDF receipt option will only be available if your browser is configured with a suitable PDF reader (such as Adobe Acrobat).
An example of the receipt output is shown below.